Creating a professional-looking YouTube setup doesn’t have to cost a fortune. In fact, with a little creativity and some smart choices, you can build a DIY studio that looks great and functions efficiently for all your video needs. Whether you're starting out or looking to upgrade your current space, setting up a studio on a budget can be fun and rewarding. In this guide, we’ll show you how to create a YouTube studio setup that’s both effective and affordable.
Why You Need a Dedicated Studio Space
Having a dedicated space for recording videos allows you to maintain consistency in your content, giving you control over lighting, sound, and background. A good studio setup can also save you time, as you won’t need to set up and tear down equipment every time you film. Plus, it helps eliminate distractions and gives your videos a more professional and polished appearance.
Step 1: Choose the Right Space
The first step in creating your DIY YouTube studio is selecting the right space. Ideally, this should be a quiet, well-lit room where you can leave your equipment set up for easy access. If you don’t have a spare room, consider converting a corner of your living room, bedroom, or office.
Here are a few things to keep in mind when choosing your space:
- Natural light: A room with natural light is ideal, but if that’s not possible, make sure you have access to good artificial lighting.
- Quiet environment: Try to avoid spaces with a lot of background noise, such as near windows or doors with street noise, appliances, or air conditioning.
- Enough space: Your setup should allow for enough space to comfortably set up your camera, lights, and any other necessary equipment. A corner of the room or an empty area works best.
Step 2: Lighting
Lighting is crucial in creating a professional-looking YouTube video. Good lighting makes a huge difference, ensuring that your face is well-lit, and that your videos have the desired look. For a DIY setup, you can use affordable lighting equipment or even make use of natural light.
Natural Light:
If you're recording during the day, natural light can provide soft and flattering lighting. Set up near a window where you can get consistent sunlight. However, natural light can be inconsistent, so you may need to supplement with artificial lights.
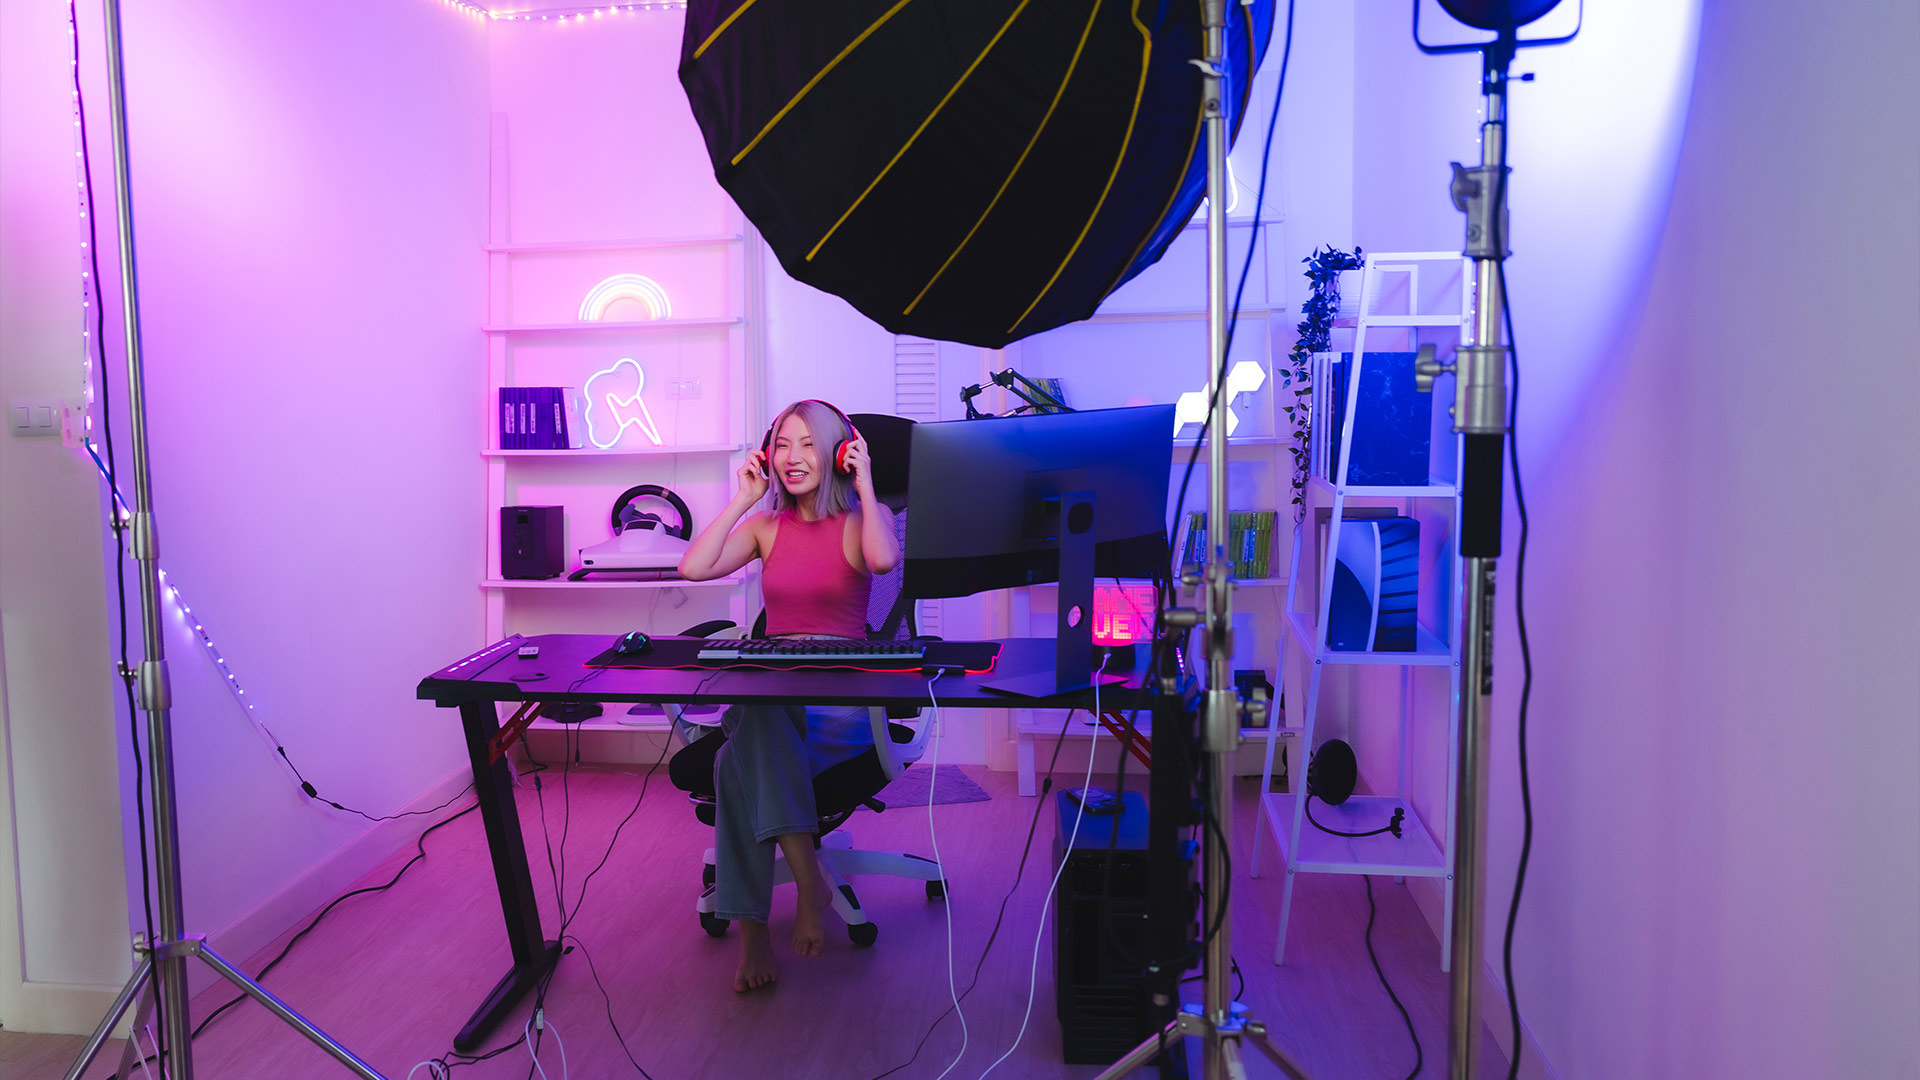
Softbox Lighting:
A softbox is an affordable and effective way to diffuse harsh light and create soft, even lighting for your videos. Softboxes are available in a range of sizes and price points, making them a great choice for budget-conscious YouTubers.
Pro Tip: Position your softbox at a 45-degree angle from your face for the most flattering lighting.
Ring Lights:
Ring lights are a popular option among beauty vloggers and YouTubers who film close-up shots. They help eliminate shadows and create a soft, even light on the face, making them ideal for sitting down in front of the camera.
Pro Tip: If you’re on a budget, you can even use a basic ring light from a phone tripod to get started.
LED Panels:
LED panels are another excellent lighting choice. They offer adjustable brightness and color temperature, which allows you to customize the lighting for your specific needs. These lights are perfect for video production and come in various sizes to suit different setups.
Pro Tip: Place your LED panels on either side of your filming space to add depth and reduce shadows.
Step 3: Camera and Tripod
While the camera is the obvious centerpiece of your DIY studio setup, it doesn’t have to be an expensive, professional-grade model. Many YouTubers start out using smartphones or affordable cameras, and you can still get great results with the right setup.
Smartphone:
If you're just starting out, your smartphone can serve as a high-quality camera for YouTube. Many modern smartphones come equipped with 1080p or even 4K video recording capabilities. Pair your phone with a tripod or a phone holder for stability.
Pro Tip: Use a tripod with a phone holder to stabilize your phone while shooting. Many affordable options are available online.
DSLR or Mirrorless Camera:
If you have a bit more room in your budget, a DSLR or mirrorless camera will give you more control over video settings and offer better image quality. Popular budget-friendly options include the Canon EOS Rebel T7i or the Sony Alpha a6000.
Pro Tip: Don’t forget to use an external microphone for better audio quality.
Tripod:
A tripod is an essential tool to keep your camera steady and ensure stable shots. Look for a sturdy tripod with adjustable height and tilt to help you frame your shots properly.
Pro Tip: Invest in a tripod that allows for smooth panning if you plan on moving your camera during filming.
Step 4: Audio
Good audio is just as important as good video. Even if your video quality is amazing, poor audio can ruin the viewer’s experience. Here are some affordable options for improving your audio quality:
External Microphone:
A good external microphone is a must-have for YouTube content creation. While many cameras and smartphones have built-in microphones, these often capture background noise and are not very clear. You’ll get much better sound quality by using an external microphone.
Popular Options:
- Lavalier Microphones (Clip-On): Great for hands-free audio. Clip these to your shirt, and they’ll capture your voice clearly without needing to hold the mic.
- Shotgun Microphones: These directional microphones capture sound from a specific area, making them perfect for focused dialogue while minimizing background noise.
- USB Microphones: Ideal for recording directly into your computer. They’re often used for podcasts or voice-overs.
Acoustic Treatment:
If you’re recording in a room with a lot of echo, consider adding some sound treatment. Use foam panels, curtains, or even blankets to dampen the sound and reduce echo.
Pro Tip: Try recording with a towel or blanket over your head and microphone for a quick DIY sound booth!
Step 5: Background and Decor
Your background should be clean and visually appealing. If you have a cluttered or distracting background, it can take attention away from your content.
Simple and Clean Background:
If you’re limited on space, a simple, clean background works best. A plain wall or a bookshelf with a few decor items can give your videos a professional touch.
Green Screen:
If you want to get creative with your backgrounds, consider using a green screen. This allows you to digitally insert any background you want, such as a branded logo or a customized scene. Many affordable green screens are available, and they work well for YouTube content.
Props and Decor:
Consider adding some personal touches to your background that reflect your style and content. Whether it’s a plant, a bookcase, or some props related to your niche, these elements can help make your videos more engaging and visually appealing.
Step 6: Editing Software
Once you've filmed your content, you'll need editing software to put it all together. There are plenty of free and paid video editing tools available, even for beginners. Some popular options include:
- iMovie (Free for Mac users): A simple and easy-to-use option for those just starting out.
- DaVinci Resolve (Free): A professional-grade editing software with advanced color grading and editing tools.
- Adobe Premiere Pro (Paid): A powerful video editing software with a wide range of features, ideal for more advanced editors.
Pro Tip: Learn basic editing techniques, such as cutting, adding transitions, and color correction, to make your videos more polished.
Creating a DIY YouTube studio doesn’t have to be expensive or complicated. By investing in the right tools, optimizing your space, and paying attention to details like lighting, sound, and background, you can produce high-quality content that stands out on YouTube. Remember, your content is the most important aspect of your channel, and a great setup will only enhance the experience for your viewers.
With a bit of creativity and the right equipment, you’ll be well on your way to creating professional-looking YouTube videos from the comfort of your own home.